Making my own tortilla's... sort of.

Once I got into my later teen years by brother 'J' and I (he's younger by 2 1/2 yrs) started having some of the same friends. We went to church a lot - which included both Sunday morning and evening services. A big part of the 'raison d'etre' around especially a Sunday evening service for me (and eventually my brother) was so that we could all pile into a car and go out after church and enjoy ourselves whilst eating junk food. For both J and I, our junk food of choice became Taco Bell. What could be better - cheap food that was tasty (ok, I know... but really, it kinda is), great hot sauce and it filled the car with ridiculously hilarious sounds and smells on the way home after. I recall on more than one occasion having hot pepper packet eating contests - Gross!
Anyway, thus began my fascination with Tex-Mex. Lately, here in T.O. I've given up trying to find something that is really well-done (if anyone has some good suggestions, PLEASE pass it on) and taken to either making my own thing or once a year or so making a homage back to the nasty fast food joint (making sure to load up adequately with hot sauce!)

I do make 'taco's' here at home for the kids but haven't really tried to do much with it - ground beef, beans, spices. Well, I finally discovered that it's really not that hard to make reasonably adequate flour tortilla's. AND I actually really like them. So, with my new tortilla recipe under my belt, I ventured successfully into veggie bean/corn and rice taco filling which was really good. Add to that the awesome chipotle powder from my 'Big Carrot' extravagance last weekend and the veggie rice just knocked it out of the park. Serve with some sour cream (no low fat stuff... ok? We've had this talk) and salsa and you'll be making these puppies at every available opportunity... YUM

Flour Tortilla's
adapted from Homesick Texan
makes about 8 large tortilla shells (double this recipe if you are having a crowd, or are really hungry)
2 cup all-purpose flour
1 1/2 tsp baking powder
1 tsp salt
2 tsp vegetable oil
3/4 cups warm milk
Mix together dry ingredients in a large bowl and set aside.
Slowly add warm milk. Stir until a loose ball forms. Knead for a couple of minutes on a floured surface until the dough is firm but still soft. Place dough back in the bowl and let it rest for about 20 minutes. Separate the dough into 8 sections and roll each into a ball. Cover each of the balls with a damp cloth while you roll one out into a large circle. Let it be thin and about 8 inches around.

Place the tortilla into a heated caste-iron skillet, I didn't use any oil but you could lightly brush with butter or oil if you would like. Cook each side for about 30 seconds. Store the cooked tortilla's on a plate covered with a cloth until you are ready to use it.
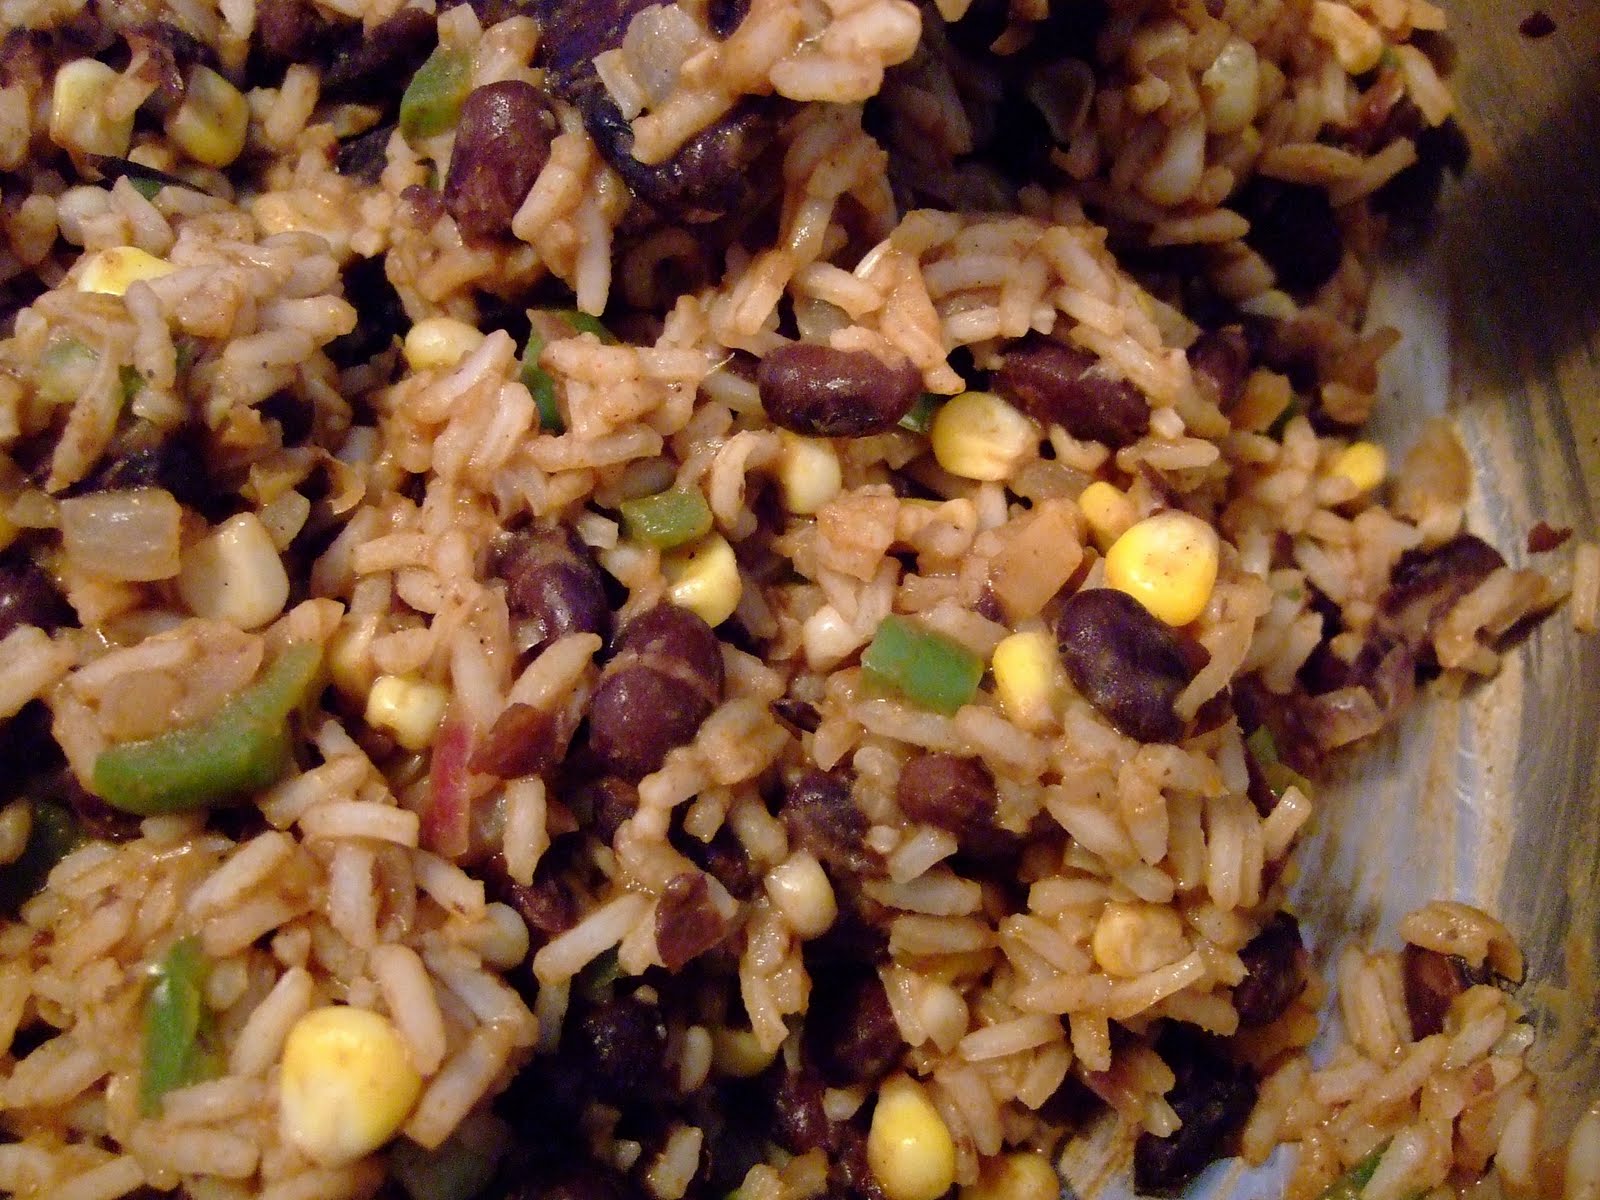
Bean and Corn Rice
(adapted from 'Taste of Home Magazine - my Mom awesomely gets me a subscription every year)
serves 6
3 cups cooked rice
1 large can of black beans or kidney beans, drained mostly
1 1/2 cups of corn (frozen or canned - just not creamed corn!)
2 tbsp oil of choice
1/2 red onion, chopped fine
1/2 green pepper, chopped fine
4 cloves garlic, crushed
2 tsp sea salt
1 1/2 tsp smoked chipotle powder (!)
1 tsp cumin
1 tsp paprika
1 tsp coriander
(you could also use a premixed taco seasoning instead of all of this - it would turn out just fine.)
In a heated Dutch oven saute the veggies in oil for about 4 min. Once the veggies are wilted add in the beans and mix well. Add in the corn and mix well and allow the mixture to cook over a medium to low heat for a few minutes. Add in all the spices and check for taste. Once you are happy with that then add in the cooked rice and mix well. Check tastes again and serve!

I think that stuffed green pepper would also be really nice here - some cheese on top, a little salsa on the side. Nice 'no-carb' option (not that I give a rats ass about 'no-carbs' ;-)

Spicy, Peanutty Bok Choy Stir Fry
 I just got back home after an awesome yoga class. I read a book a while ago ('Skinny Bitch in the Kitch' - not the greatest read but there are some good morsels in there) which stated that if everyone in the world practiced yoga there would be world peace. I thought that it was a gross over-exageration at the time but now... I almost believe it myself. I'm ravenous though - I know 'biker-chic', Ms 'yeah-I-run-10k', ravenous after a little 90 min. yoga class. But, there it is.
I could have gotten something down in Greek town where my class was but I've been craving veggies lately. To be honest, I haven't been eating well lately. Little snacks really more than anything. Today I needed veggies and protein. So I picked up some beef at the health food store and rode home (yeah - I biked to my class - total hippie) and pulled out the bok choy that came in this weeks food box.

I was psyched. Originally a simple bok choy/beef/soy sauce thing was in my mind. Somehow though all these other veg's made it out of the fridge and landed on my cutting board. The next thing I knew I was pulling out the peanut butter and goin' to town with the pepper sauce.
What resulted was still pretty simple but absolutely just what I needed. Right now I am totally and utterly satisfied. Serve this by itself or with whatever grain you prefer. I have only just discovered that I'm out of quinoa, otherwise that would have been my grain of choice with this puppy. Brown rice would hold up nicely to these bold flavours as well.

Bok Choy and Beef Stir Fry in Spicy Peanut Sauce
serves 4
2 - 3 tbsp oil
1/2 red onion, sliced thin in rings (this is huge for me!!!)
2 medium carrots (sliced through the long blades on the box grater)
1/2 zucchini (that's all I had, you could use more), sliced long and thin
2 medium sized bok choy, ends cut off then cut it like celery
4 cloves of garlic, crushed
1 lb of beef sliced thin for stir-frying (You could use 3 scrambled eggs instead)
3 - 4 tbsp of soy sauce
1/2 cup peanut butter
2 tbsp Hoisin Sauce
1 tbsp pepper sauce
red pepper flakes (I sprinkle it on top of my serving)

In a heated wok pour the oil. Add in the veggies and saute about 5 minutes until the veggies are kind of cooked but not too wilted. Add in the beef and let it brown. Add in the Soy sauce and then add in the peanut butter. Mix it together (yeah, right in the wok) until it's all mixed together. Add in the hoisin and pepper sauce and check the taste.

Serve with grain of choice and sprinkle with red pepper flakes.
Summer... Chocolate Ice Cream

That's right my peeps. Summer! Well, not quite... but it feels like it here in Toronto, ON. Look, here's how I see it. We only get summer for a couple of months here - 3 to be utterly exact. I think that when we get great weather in May, it's as good as begun. Derek and I were able to enjoy our first 'terrace' experience this season, people watching out on our favourite patio on our date night. As if the great weather wasn't enough, we're all starting to catch World Cup Fever here in the house. The excitement is building. So, See... there are many indications that summer has indeed begun.
As soon as summer hints at making an appearance, I'm pulling out my ice cream maker. A most beloved gift from my mom-in-law. I've tried many recipes but always come back to this one.

Derek is a big ice-cream guy. Me, not so much. I've got a couple of recipes nagging at me though this season which I will get on soon... trust me. But really, the tried and true Chocolate ice cream. I found this on a search at Epicurious.com and at really has never failed. Delish! The better quality the chocolate, the better the ice cream. I use Callebaut 60% choc chips (which incidently I've seen on ocassion at Bulk Barn for those interested). If you have an ice cream maker just trust me on this one. You won't be disappointed.

Chocolate Velvet Ice Cream (from Epicurious.com)
2/3 cup of dark chocolate (about 60% cocoa solids)
1 cup sugar
1/2 cup cocoa powder
1 1/2 cups heavy cream
1 cup milk
3 large egg yolks

Make sure that the chocolate is chopped small. Combine the sugar and cocoa in a medium sized, heavy bottomed saucepan. Add in the cream and milk and whisk until combined. Bring the mixture just to a simmer over medium heat. Remove from heat. In a small bowl, beat the egg yolks until smooth. Take large spoonfuls of the cream mixture and whisk it into the egg yolks until combined (about 2 large spoonfuls). Then add the yolk mixture into the cream mixture. Place it all back on the heat and let a food thermometer get to 170 degrees F. (usually I just keep it on for maybe 5 min., do the back of the spoon test - if you can run your finger down the back of a spoon and the mixture doesn't immediately flow back together then it's ready). Once heated remove from the heat and add the chopped chocolate. Make sure that the chocolate is complete melted into the mixture and then run the whole mixture through a seive into a large bowl. Cover the mixture with plastic wrap - make sure that the wrap is right on top of the chocolate mixture otherwise a film will form on the top of the chocolate custard. Cool off to at least room temperature then put it into an ice cream maker until it firms up (about 20 - 25 minutes.

Place in a container and put in the freezer until it completely firms up.
Let it melt just a bit before serving and totally enjoy!
Chipotle inspiration.


I love getting inspired. I love it when one ingredient takes you on a ride and you end up somewhere you just couldn't have imagined. It happened for me this weekend. Once again, bouncing around in 'The Big Carrot', I really needed some cumin (got stuck in the middle of a recipe the day before and discovered I was out - ugh!). While trying to figure out how the *&%$ to get the cumin out of the container (really - come on, does it have to be that complicated?), I spied this smoked chipotle powder and... well, I ended up with a very small bag of cumin and a large bag of smoked chipotle powder.
SO
On the back of the chipotle powder package was a recipe for mushrooms sauteed in chipotle powder and then used as an appetizer. Here's where things started to wind in a different direction. My next thought was 'I have spinach in the fridge' (seemingly completely unrelated - right?), followed closely by '...and I could do some rice too'. Ok, now we've got something here. And So it was born. A meal (or very tasty side-dish) stemming from one little ingredient and a spice at that - but what a beautiful creation! If you get your hands on some of this red gem don't let it go!!

Chipotle Rice with Mushrooms and Spinach
serves 6
1 lb button mushrooms, halved
1/2 red onion, diced small
3 cloves garlic, crushed
4 cups of spinach, stemmed and chopped
3 tbsp of olive oil, butter (or sometime I'll use bacon fat leftover - no waste)
3 cups of cooked rice
2 tsp chipotle powder (this will kick so if you are nervous about heat, scale back to 1 tsp)
3 tsp bouillion powder
1 1/2 tsp salt
dash of cumin (ok, I had to use it b/c it was the whole reason I was in the store in the first place, right?)

In a heated Dutch oven saute the onion and mushrooms in oil/fat until the onion just starts to get clear. Add in garlic and spinach and continue to saute until spinach wilts (just a few minutes).
Add the spices into the veggies and mix well. Add in the cooked rice and mix well again. Double check the seasoning (this will have a nice little kick so beware).

This was beautiful. I can't wait to try this in my upcoming bean and rice burrito recipe... soon!!!
Chocolate Thumbprints

I got nervous with this one. Where's the egg? Where's the baking soda or baking powder??? Where's all the sugar? It's a little unnerving. So unnerving in fact that I checked about 3 other websites just to make sure that there wasn't some kind of typo in my cookbook. Nope. I'm not dreaming or seeing things... that really is the recipe. I was using Martha's cookie book so I honestly can't imagine anything being wrong with the recipe but, you know... it was so different...

It looks like a little bit of fiddling on paper but the reality (for me at least) was that it was pretty straight forward once I was into it.
These turned out quite well for a first attempt and they look kind of cute too. The texture of the cookie itself is almost like a shortbread - definitely on the crunchier side. I used 60% cocoa solids chocolate and it was YUM. The kids like it, I can send it to school because... no nuts and well, it was pretty much a success. I would make these again.
I know that I don't sound terribly excited. They didn't blow my mind but they are good cookies that were actually almost easy.

Chocolate Thumbprint Cookies
(adapted from Martha Stewart Cookies)
1 cup unsalted butter, at room temperature
1 cup icing sugar
1/4 tsp salt
2 tsp vanilla extract
2 1/2 cups all-purpose flour
3 tbsp unsalted butter
2/3 cup semisweet chocolate, chopped
1 tsp corn syrup
Preheat oven to 350 degrees F.
Prepare a baking sheet with parchment or non-stick liner
In a large bowl beat together the butter, icing sugar, salt and vanilla until smooth and well combined. Beat in flour and mix well.
Form balls using about 2 tsp (although mine were about a tbsp or just under) and place 1 inch apart on the baking sheet. Bake 10 minutes. Remove from the oven and press the middle down with your finger (WHAT! REALLY!!! Ok, I used the butt end of my rolling pin - Please, save your fingers!) of each cookie down to make a well. Bake for another 7 - 9 minutes (keep an eye on them just in case). Remove from oven and cool completely on a baking rack.

Combine the chocolate, 3 tbsp of butter and corn syrup in a small saucepan or heat-proof bowl and place over simmering water until melted. Allow to cool just a bit and them fill each cooled cookie with the chocolate mixture. Allow to set completely before storing.
Chicken Pot Pie

I'm quite proud of myself right now. I've managed to make something out of nothing. I really despise the thought of having to go out and buy ingredients for every, single thing that I make. Often, it feels like, I'm ready to go on a recipe and then discover that I'm out of something crucial. Today, the big issue was that I was out of almost everything. My Mother-in-law June had kid #1 and kid #2 all weekend. So, Derek and I belatedly celebrated our anniversary, I had a great yoga class and spent the remainder of a saturday shopping and noshing with my BFF KT!, it was great... but I didn't cook a thing. So, by Sunday afternoon we are hungry and getting desperate. I'm damned if I'm going to grab something quick again. So, I get the remains of the roasted chicken (which I use for sandwiches during the week) and some veggies that are laying around and well... find these pastry things in the freezer and voila!

It looks really fancy. If I hadn't had these pastry thingies in the freezer than I totally would have thrown together my own crust but why make things more complicated

AND it's nice to clear some more space in my freezer (which honestly isn't very full anyway!) - How full are you supposed to keep your freezer for maximum efficiency??? Another thing that I'm proud of myself for is that, although I didn't have any bouillion or chicken stock, I just used the stuff in the bottom of the roast pan as my stock and it was beautiful! Nice way to reduce the waste. Once again, my peeps, you could change this up - completely do away with the meat and replace with more veggies, use a fish (although I'm down on using fish right now) or other meat... you get the idea.

Chicken Pot Pies
1 pkg Puff Pastry or 2 pkg of Puff Pastry cups (that's what I used)
1/2 red onion, diced small
2 med/small carrots, sliced thinly
1 rib celery, sliced thinly
4 asparagus spears (I had it in the fridge!), cut in chunks
3 cloves garlic
3 cups of cooked chicken, cubed small
1/2 cup of flour
2 cups of milk
2 packets of chicken bouillion (low salt)
dashes of Worcestershire Sauce, Soy Sauce, Pepper Sauce (all to taste)
2 tsp salt
cook Pastry cups to package directions - If you are using one large hunk of puff pastry then just hold off here.
In a large, heated dutch oven. Add some olive oil for sauteing. Add in the veggies and saute until soft. Add in the chicken and mix well. Add in the bouillion packets, sauces and salt. Then add the flour and mix well. Gradually add in the milk. If it gets too thick add in a little more milk to get to the desired consistency (I made mine quite thick). Check taste and adjust if needed.

Fill each pastry cup with chicken mixture and top with the little 'hat' that you had to cut out.
If you are using the hunk of puff pastry. Place the chicken mixture in a large baking dish and place the puff pastry on top (might want to place it over the edges of the dish) and bake to the package directions (probably 18 - 20 minutes).
Peanut Butter and BACON cookies... dedicated to Jesse.

I may be going out there a little too far for some of you... hell, I'm out there pretty far for myself! However, I must explain. Derek and I recently celebrated our wedding anniversary at a wonderful spot here in Toronto called Trevor Kitchen and Bar. Our friend Jesse Vallins is the Chef de Cuisine and, despite all of our best efforts to be inconspicuous, He always discovers that we are there and treats us ridiculously well. We ended up getting multiple first courses and among our favourites was the heirloom tomato salad with bacon vinaigrette (BTW - Derek Never eats salad but he ate this one!) with a little breaded deep fried dill heaven and the BLT Consumme (Yes - you read that right) as for our other choices (Oh like the truffle and reggiano drizzled poutine! and my gorgeously rare lamb) we were also thrilled... Oh and the glass of sparkling Spanish helped the mood as well. Jesse really... you outdid yourself!

So inspired by the bacon craziness of late I decided to get on with making this recipe that I've been toying with for a while. I first saw the idea on Joy the Baker's website and did some tweaking of my own and came up with this little cookie. Part peanut butter cookie, part bacon breakfast and ALLLLL decadent! Delish! I may be out there but at least it tastes good to be here.

Peanut Butter Bacon Cookies.
(Adapted from Joy the Baker)
Makes a boat load!
3 cups unbleached, all-purpose flour
1 tsp baking powder
1 1/2 tsp baking soda
1 tsp salt

1 cup unsalted butter at room temp.
1 1/2 cups peanut butter (I used all natural crunchy - another great use for my chopstick collection)
1 cup sugar
1 cup brown sugar
2 lg eggs
8 slices of bacon, cooked until crisp and broken into small, crunchy pieces
Preheat oven to 375 degress F. Prepare a cookie pan with a silicon baking sheet or parchment paper.
Combine the flour, baking powder, baking soda and salt in a bowl and set aside.
In a separate bowl beat the butter and peanut butter until smooth and well combined. Add in the sugar and beat until fluffy - about 4 minutes or so. Add in the eggs and combine well.
Add the flour into the mixture and mix until well combined.

Sprinkle in the bacon pieces and mix well. Place tablespoons full on prepared baking sheet and press down with a fork. Bake for about 11 minutes.
Subscribe to:
Posts (Atom)
About Me

- Wanda Thorne
- St Michael's Choir School is celebrating it's 75th anniversary year of service to St Michael's Cathedral. Part of the school celebration is a trip to Italy where our boys from Grades 5 - 12 will be performing and celebrating Mass. This blog will be chronicling our adventures. Wanda Thorne is the Vocal Coach at St Michael's Choir School. Gerard Lewis is the Grade 7/8 Homeroom teacher at the Choir School.
About Me
- Wanda Thorne
- St Michael's Choir School is celebrating it's 75th anniversary year of service to St Michael's Cathedral. Part of the school celebration is a trip to Italy where our boys from Grades 5 - 12 will be performing and celebrating Mass. This blog will be chronicling our adventures. Wanda Thorne is the Vocal Coach at St Michael's Choir School. Gerard Lewis is the Grade 7/8 Homeroom teacher at the Choir School.
FBC Member

