Showing posts with label caramel. Show all posts
Showing posts with label caramel. Show all posts
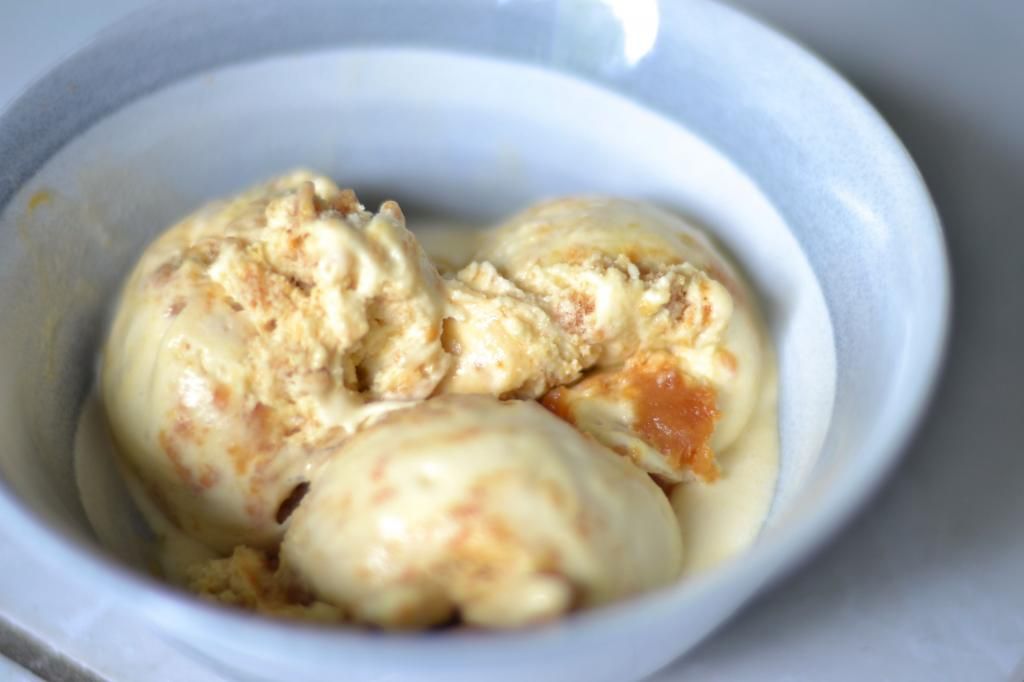
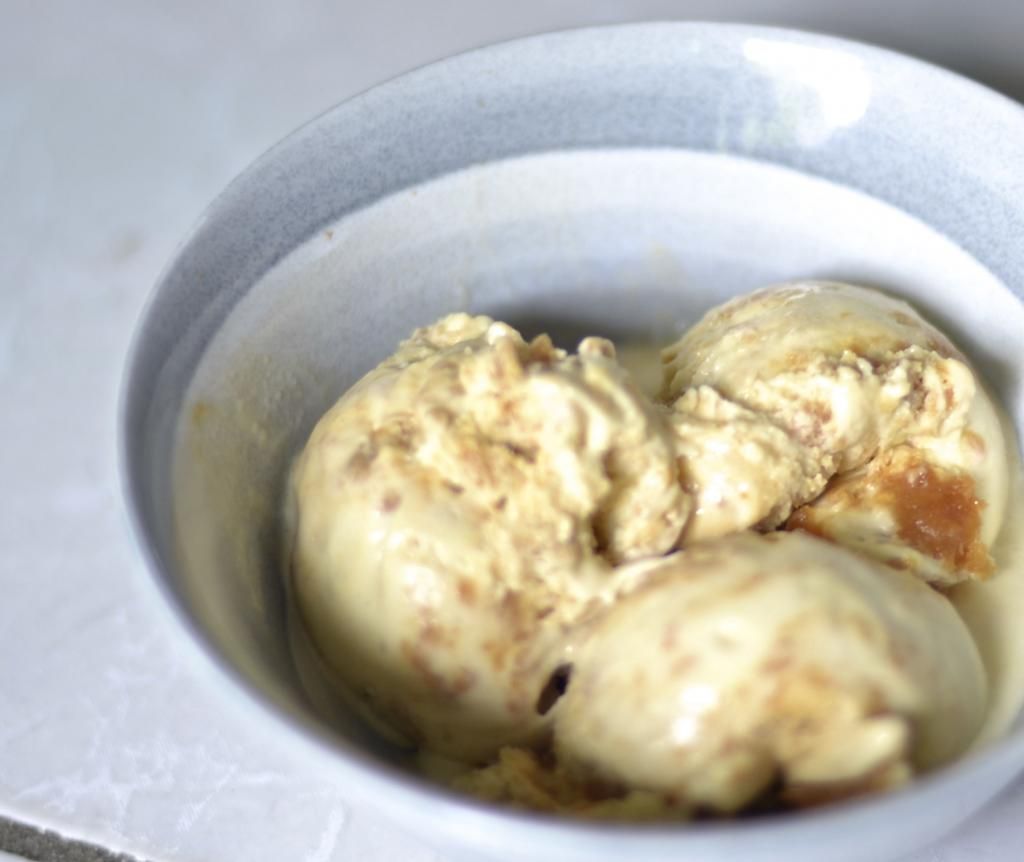
Caramel Apple Ice Cream
We are looking down the barrel of U.S. thanksgiving which is really not a thing at all here in Canada. It's just something we are aware of... and maybe do a little black friday shopping on Amazon. We are in the dead of winter as far as weather is concerned. Biking has been off the table this week and temperatures have dipped way below what we are used to. I'm working really hard at not letting this affect my mood greatly. I am looking at weeks of crazy christmas concerts and events and things that I have to plan and attend and still get organized for January work... and my family is currently checking out the 2015 potato calendar. It's a real thing.
Here are some things that I thought were noteworthy over the last month:
1. The Oatmeal's take on Net Neutrality
2. Thanks to a Canadian quasi-celebrity we have all been talking a whole lot more about sexual abuse and harassment. Let's hope that this talking continues and turns into a real change in the way society views the women in it.
3. I've been geeking out to this song
4. If I don't make this and this soon I just don't know what I'm going to do.
5. This blogger beautifully summed up a lot of the food lies that women believe about other women. You know all of those food shots where an incredibly beautiful and thin woman about to eat something big and crazy.
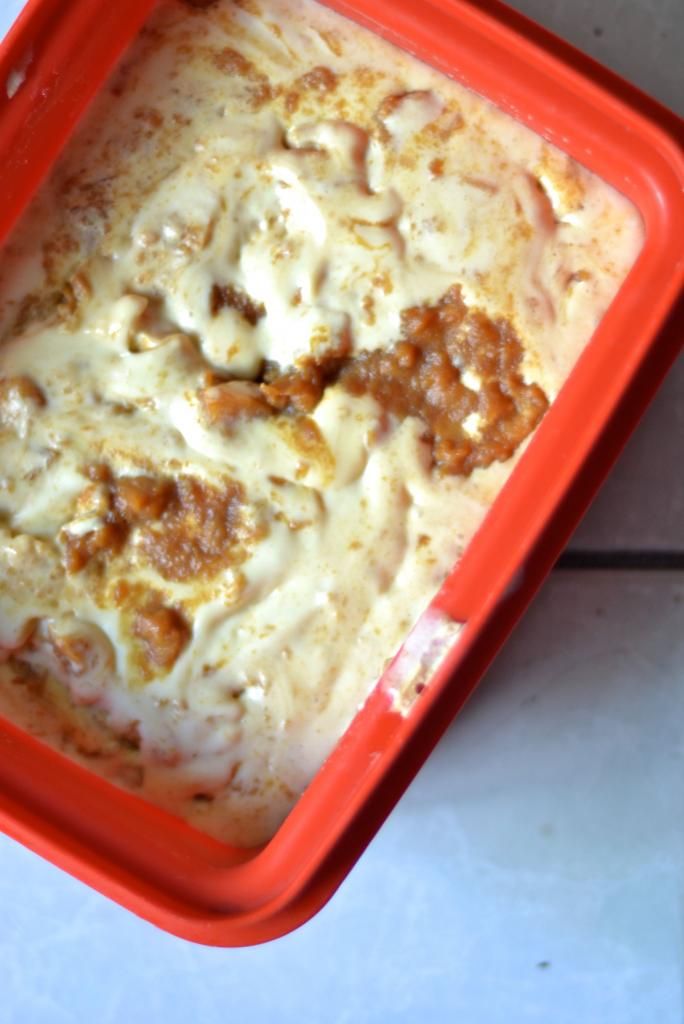
I made this ice cream a good while ago and, in the spirit of not spreading food lies, I didn't eat very much of it. I tested it and it was good. Truth is I'm not much of an ice cream person. In fact, lately food and I haven't been close but that's another story for another time. Kid #2 won't go near this kind of ice cream if it were the last thing on earth to eat. D basically won't touch ice cream unless it's chocolate or good quality vanilla (I totally get behind that). So that left Kid #1. She dutifully had a bowl or two but let out a sigh of relief when we had guests over because we served this ice cream with apple crisp. It's pretty rich stuff and the texture and tastes worked well together. Feel free to adjust the caramel to apple ratio if you think it might be too sweet for your liking.
Caramel Apple Ice Cream
makes 1 litre (or so)
1 1/2 cups whipping cream (the heavy stuff)
1 cup milk
4 egg yolks, whisked together in a bowl
1 cups sugar
2 tsp vanilla or vanilla paste
Caramel Apple Sauce
3 - 4 sm/med apples - peeled, cored and diced
2 tbsp brown sugar (optional - depending on the sweetness of the caramel that you are using)
pinch of salt and cinnamon
1/2 cup caramel sauce (I made my own from here but you could even melt in some kraft caramels if it came down to it)
Add the diced apples to a heavy bottomed pan and heat over med/low heat. As the apples start to cook you might want to add a dash or so of water to prevent sticking. Add in the brown sugar, salt and cinnamon. Cook until the apples have gotten all mushy and soft and the liquid has cooked down (I simmered mine for about 10 minutes to dry it out a bit) Remove from the heat, add in the caramel and mix well. Set aside.
Ice cream:
In a heavy bottomed saucepan, heat the sugar gently over med/low heat for just a minute. Add in a little of the cream and mix well to dissolve the sugar. Once dissolved, add in the rest of the cream and all of the milk. Continue to heat until it almost comes to a boil, turn the heat down to about a half of what you started at and add a little of the hot cream mixture to the egg yolks, stirring constantly. Continue to add the hot cream to the egg yolks in a very small, steady stream until the yolks are warmed up (about a half a cup of the hot cream). Pour the egg yolk mixture back into the hot cream. Place it back onto the stove and stir with a wooden spoon until the mixture heats up enough to coat the wooden spoon (you should be able to run your finger over the back of the spoon and have the mixture remain in place without running).
Remove from heat and run it through a sieve and into a bowl. Cover with plastic wrap (press down so it is right on the warm custard mixture all the way around and even stuck to the sides of the bowl) and cool completely to room temperature. Place in the fridge overnight.
Once refrigerator cold, pour into an ice cream maker and run for about a half hour or until the mixture reaches a soft serve consistency. Pour everything into a freezer container and stir in the caramel apple mixture.
Freeze.
Soften for a few minutes before serving.
Peanut Butter Ice Cream with Caramel Ripple

Well, it's August.
What a summer it's been so far.
I haven't gone away for vacation - I might still but I might not either.
So far I've been keeping myself occupied but not busy with lots of stuff.
Here's a little run-down of things that I've been doing and/or working on:
- Starting my half-marathon training nice and early... 'cause I want a good time this year, Oh Yeah.
- Trying to figure out why one of my tomato plants is drying up. Figuring out that it's getting too much water and then nursing it back to health.
- Reading... lots. Trying to read things that make me think without getting me too dark. It's hard and it often doesn't work 'cause I'm not terribly interested otherwise.
- Going here... and here... and seeing this at a cheap theatre... and getting together with lots of friends.
- Trying to figure out how not to be completely broke by about the middle of August (might almost be successful this year)
- Actually taking Kid #2 to a park (!) on two different occasions. It really is a big deal.
- Making lots of birthday cakes and presents (July is birthday central around here)
- Not cleaning my house.
- Making ice cream.

Yeah. I made ice cream... again. Peanut butter... again. With Caramel ripple this time... I burnt the caramel. That sucked.

The peanut butter ice cream recipe is good but this one was better. I think that the honey thing changed the texture too much for me. I used a creamy honey rather than a clear, runny variety. I wouldn't do that again. Generally though the other peanut butter ice cream recipe was just a more pleasant taste and texture for me. I also wasn't in love with the caramel ripple thing. I think that the chocolate worked better. Quite honestly I think that the caramel ripple idea would work better with vanilla ice cream or something like it. A simpler ice cream to showcase the caramel. Caramel is special and shouldn't be competing with a strong flavour like peanut butter... I know, right?
Seriously, I have a cue of ice cream recipes that I want to try out. I'm not sure where to go first. Coffee maybe... I don't know. There are so many. Maybe this one? Either way, if you want to make peanut butter ice cream I wouldn't honestly go with this one. I would make the other one... and if caramel sounds like the perfect addition for you then by all means go for it - add the caramel recipe below.

Peanut Butter Ice Cream with Caramel Ripple
adapted from The Kitchy Kitchen
2 cups heavy cream
2 cup milk
1/2 cup packed brown sugar
3 or 4 (I used 4 because I had an extra yolk leftover from something else that I forgot about until the last minute so I threw it in)
3/4 cup regular peanut butter
4 tbsp clear, runny honey (if you use honey infused peanut butter - like I even knew that existed - then decrease the amount to 2 tbsp)
1 tsp sea salt
1 tsp vanilla
Caramel:
1 cup sugar
4 oz butter
3/4 cup heavy cream
1 tsp vanilla
Using a heavy bottomed saucepan heat the cream, milk and sugar until the sugar is melted and the mixture is just under a boil. Turn the heat down to low.
Mix together the egg yolks and set aside. Add in a little of the heated cream/milk to the egg yolk bowl, stirring constantly. Once the cream/milk has warmed the yolks then add the whole bowl back into the saucepan. Heat again over medium heat until the mixture reaches about 170 degrees F or is thick enough to do the finger test successfully.
Remove from the heat and add in the peanut butter, honey, salt and vanilla. Stir until everything is well blended. Run the mixture through a seive.
Cover the mixture with plastic wrap, placing the wrap right onto the custard so that it won't form a crust on the top. Refridgerate at least 3 hours but overnight is best - the mixture needs to be completely cooled.
Churn in an ice cream maker as per normal.
Layer the churned ice cream and the cooled caramel (directions below) alternately beginning with a little caramel on the bottom of the container.
Freeze... and then serve.
Caramel:
Heat the sugar in a heavy bottomed sauce pan over med. heat until the sugar liquifies and turns brown but doesn't get burnt (like mine did) - as soon as it starts turning colour you could try turning the heat down significantly to prevent the burning. Let it turn med/dark brown (it will get dark and burnt very fast so watch it carefully)
Remove from the heat and add in the butter (the stuff will bubble a lot so be prepared). Mix well.
Add in the cream and vanilla and mix well.
Cool.

Shortbread Caramel Bars and a little Redemption

Life Lesson: Learn from crap and move on.
I don't enjoy staying angry/upset/depressed for long. It's... well, depressing (huh?). Glean what you can learn from a bad situation and move forward, look ahead. And that, my peeps, is exactly what I did.
Feeling completely shattered by my failed cake - seriously though, isn't that just a little unbalanced of me. Don't you think? - I decided that what was needed was to wash that cake right out of my hair.
Cue 'New Project'.
I have a list in my bookmarks bar called 'Must Try It'. All the recipes that I see on sites that I know I want to make but am not going to make them in the immediate future go to this bookmark. The list is long and takes in just about anything you could imagine. I'm figuring that soon I'll have to divide it up. You know, 'Sweets I Must Try', 'Greens I Must Try', 'Cass. I Must Try'... you get it. I'm going to need a bigger bookmarks bar. One of the most recent items to hit the 'Must Try' bar though are these puppies... I need a long weekend for that though. I'm thinking that my next long one will be Easter and that might just be the perfect time... if I can wait that long.
So, long story short... these were sitting in my 'Must Try' just waiting for the appropriate time. That time, and I knew it would come, when decadence and over-indulgence were the tone of the day. A time when the combination of shortbread, caramel and dark chocolate would lick my wounds for me and soothe me into comforting happy land again. A time when simmering, bubbling, multi-stepped recipes would be just the thing to restore addled nerves.

That day my friends, arrived yesterday. I find it absolutely soothing to bake or chop veggies or nurse something cooking on the stove. It's like therapy. I can stand for a few minutes, chopping, mixing, stirring, pouring and at the end of it I've got something we can all enjoy. It's like running and Yoga... it clears my head.
So, after the cheapest therapy session ever and with a very clear head (won't last long), here are the bars that have restored my equilibrium again. Thank you 'Not Without Salt' and thank you dark chocolate (fairly traded of course) and caramel. Big Sigh.

Homemade Twix Bars (adapted from 'Not Without Salt' - p.s. she has really nice pictures)
Shortbread:
2 cups unbleached all purpose flour
1/4 cup sugar
pinch of salt
2 tbsp of crushed rice crispies cereal (yeah, seriously - my addition, Ashley uses actual rice that she whizzes, also an option for 'ya)
1/2 cup + 3 tbsp unsalted butter at room temperature
Preheat the oven to 350 degrees F.
Prepare a 9x13 inch baking pan by spraying it OR lining it with parchment (or aluminum foil) and using a little butter to grease the paper.
Mix the flour, sugar, salt, crushed rice (crispies) together in a bowl. Add the butter and cut it together. You can use a pastry cutter or two knives. Cut the mixture until it forms a crumb like texture.
Pour the crumbs into the baking pan and press into the pan until it's packed on the bottom.
Bake for 12 min. Turn the pan in the oven and bake for another 10 or so. Until the crust is golden at the edges.
Remove from oven and cool (you can turn off the oven now)

Caramel:
2 cups sugar
1/2 cup water
3/4 cup Lyle's Golden Syrup
1 tsp fresh lemon juice (I didn't have any lemon so I had to leave this out)
1 cup whipping cream
1 cup sweetened condensed milk
1/4 tsp salt (plus more for sprinkling)
Combine the sugar, water and Golden syrup in a heavy bottomed saucepan. Heat together and let it come to a boil. Do not stir it any more.

Using a candy thermometer, continue to boil the mixture until it reaches 300 degrees F. Remove from heat and let it sit for a minute, until it stops bubbling.
Carefully add in the cream (this will cause a huge bubbling up to happen again), whisk it together well and then add in the sweetened condensed milk. Whisk and return to heat. Might want to turn the heat down a bit now because this can burn easily (yup that means I burned it a little bit) and continue whisking gently. Add the salt. Let this mixture come up to 240 degrees F. Remove from the heat and pour over the shortbread. Sprinkle a little more salt over the caramel layer.

Let this set for at least two hours.

Chocolate:
6 oz. dark chocolate
3 tbsp unsalted butter
Melt chocolate and butter together over simmering water (could microwave if you wanted). Once melted together. Pour over the set caramel. Spread evenly. Let this set. You might want to refridgerate it for a while as well.

Cut the bars once everything has set. Cutting works well if they are cold. You might want to wipe off the knife in between cutting or even butter the knife a little bit.

Dulce de Leche Cookies

I have a confession to make.
It's hard for me to admit this. It's almost embarrassing.
But, here it is.... I don't eat most of the things that I bake.
Wow, that was like a weight lifted off of me. It's true. I don't have a much of a sweet tooth anymore. It's diminished significantly with age and I've gotten much pickier about what I actually put in my mouth. The thing that I enjoy is making the stuff, not eating it. It took me a long while to figure that out. It occurred to me a long time ago that quite often once I had prepared a big meal that when I finally sat down to eat it I wasn't particularly interested anymore. I would just as well preferred to sit down to some toast and natural peanut butter with honey on top. Simple is what I like to eat but I think it's fun to make all the other stuff.
Fortunately, I have kids and friends who are very happy to eat the stuff for me. Usually I at least taste what I've made, I mean just once. Sometimes, sadly, I don't. So I rely on Kid #1 ('cause Kid #2 cannot articulate any detail or nuance around food yet... only lego) and friends like KT to do that work for me. It's a hard sell as you can imagine. Here's the thing though, I really do want to taste these, I mean look at them.

Something this cute and squidgy needs to be eaten... although one hasn't quite made it into my mouth yet.
I really have wanted to make these cookies for an age but was really afraid to try the dulce de leche stuff which was dumb. Why was it dumb??? A) Because the dulce de leche was so ridiculously easy and B) Because these cookies are off the chain worth it. I can't believe that cookies with no egg, no milk, not very much sugar (except the sweetened condensed milk in the middle - forgot about that for a second ;-) and very few ingredients could bake up so light and airy. The texture is almost like a puff pastry... and then you've got this caramel stuff in the middle that's all oozy and sweet and beyond wonderful... So, if you took my advice and threw a can or two of sweetened condensed milk into a simmering bath for a few hours and now you've got some of the stuff searching for a raison d'etre then Baby... this is your thing!

Dulce de Leche Cookies adapted from 'Martha Stewart's Cookies'
makes about 2 1/2 doz
2 cups all purpose flour
1/8 cup icing sugar
3/4 cup unsalted butter, room temperature and cut into large chunks
1/4 cup water
Preheat oven to 350 degrees F and line a cookie sheet with parchment or a silicon liner.
In a bowl, combine the flour and icing sugar. Add in the chunks of room temperature butter.
 |
| My new pastry cutter! |
Cut in the butter until it forms a crumbly texture. Add in the water slowly, mixing continuously, until it forms a ball kind of shape.

Form the batter into to flat disc shapes and refrigerate for about an hour.
Roll each disc out on a lightly floured surface until it gets to about 1/4 inch thickness. Using a round shape (I used something about 2 inches or so across) cut the cookies out and place on the cookie sheet. Save unused dough, reform and cut out more... etc.
Bake for about 15 minutes, rotating in the middle of the baking time.
Remove from oven and cool the cookies completely on a cooling rack.

Place about 1 lg tsp of dulce de leche on the bottom of a disc and place a second disc on top until you've finished it all.
If you are not eating them all in one day (!) then store the cookies unfilled and fill as needed. The cookies will last longer unfilled.

Dulce de Leche... basically
 |
| This has got to be one of the most unappetizing pictures that I've ever posted. |
Why this post is happening:
I've really wanted to try this for a long time.
I've seen so many other bloggers doing this. (therefore I can too)
Who doesn't like dulce de leche?
I really wanted to make the cookies that you are going to see in the next post.
The first time I came across 'dulce de leche' it was a 'Haagen dazs' flavour. It looked like caramel on the package and I was going to be alone for the weekend. So, it came home with me and kept me company while D was away and kept me hittin' the pavement hard when he came back... worth every step though ;-)
Dulce de leche is like caramel and you can buy it in specialty shops and pay whatever for it. However, after much deliberation and desperation to make some cookies that are soon to come, I decided that it was worth trying to make it on my own.
Having never attempted it before I can now tell you that it was stupidly easy. I didn't have any problems with the can both in the cooking and in the opening. The result looked pretty damn much like the same crap they sell you in the 'special' shops and tasted as good as any I've ever experienced. In short... do it.
 |
| This is what the can looked like after 3 1/2 hrs in a water bath |

Stupid easy 'Dulce de leche'
makes as many cans as you want...
1 (or so) cans of Sweetened condensed milk
1 big pot with lid
water
Remove wrapper from can.
Place can in pot.
Cover can with water.
Bring to boil, cover and let it simmer for about 3 1/2 - 4 hours. Cool completely, removing from the water whenever you can lift it out without burning yourself ('cause i used my hands). Wait 'til it cools and then open her up....
A moment to reflect, be thankful, celebrate birthdays and old years.

In Trinidad 'New Years' isn't quite celebrated as such. Instead 'Ol' Years' is celebrated instead.
I like this idea.
I like the celebrating of what's been done, what's gone by, what we've survived (in essence ;-).
Truth be told, I've never gone in much for celebrating New/Old Years in any significant way. My church background meant that when I was young I celebrated by going to a church service, testimonies were given and then all the young people would stay up all night... eating, listening to music, playing sports and generally having fun away from their parents. Admittedly, since those days, it's pretty much been at home, quiet with a bottle of champagne (Veuve, of course!).
That was until the year 2000. Yes, the very last day of the year 2000. At 10 in the morning, after too many hours, my beautiful Kid #1 was born. She was born at home in the middle of a snow storm. Friends unwittingly drove down in that same snowstorm to celebrate with us. We had a houseful of friends and a new baby. It's been 10 years. My baby is in gr. 5. She is still, and always, the youngest in her class. She is bright, beautiful and talented. She drives me to near insanity and yet she makes me so proud. I love her to bits.
Now every Ol' Years is also her birthday celebration. And we Celebrate:


She gets to choose her cake and her favourite meal each year. This year she has chosen... not a cake but a pie. A complete change for her but totally her choice.
So, for this Ol' Years and for my Beautiful Kid #1's birthday, I give her Caramel Truffle Pie.

Remember all that's gone under the bridge this year. All that you've gained, all that you've lost. The ways that you have loved, the many ways you've grown. All the love you've been given along the way. Celebrate, Breathe deeply, be Thankful and look ahead.

Caramel Truffle Pie (adapted from Good Housekeeping)
Crust:
1 1/2 cups graham crackers, crushed
1/4 cup + 4 tbsp unsalted butter, melted
Caramel:
1 cup sugar
1/4 cup butter
1/2 cup cream or evaporated milk
Truffle:
1 1/2 cup semisweet chocolate chips
1 cup cream
3 tbsp butter
To Assemble:
Preheat oven to 350 degrees F.
In a large pie plate add the graham crackers and the melted butter.

Combine until the graham crackers can form a ball, stick together - you get the idea. Press into the base and onto the sides of the pie place. Bake for 8 - 10 minutes. Remove from the oven and cool. Turn OFF the oven
Caramel:
Heat the sugar in a high sided, heavy bottomed pan over med/low heat. Once it begins to turn golden stir it regularly. Once it's liquified and golden brown then add in the butter, turn the heat down to LOW. Once the butter is mixed in well add in the cream or evap milk. Mix well. Let it simmer for a few minutes on low heat. Should look like caramel. Might still be a bit runny. You could simmer it a few more minutes. Take off the heat and pour into the cooled graham cracker crust. Be sure not to eat anything left in the pan - we all know that caramel tastes awful! Let the caramel cool for about 20 minutes before adding the chocolate on top
Truffle:
Place a stainless steel/heat proof bowl over gently simmering water. Don't let the water touch the bowl. Add in the chocolate chips, butter and cream to the bowl and begin to melt together. Once completely melted, remove from the heat. Whisk it well for a few minutes to add in some air. Pour on top of cooled caramel.
Refrigerate the whole thing overnight or at least for a few hours until set. Remove from the fridge a half hour before serving. Serve with whipped cream on the side (or on the top) and a birthday candle or two.

A Dedication... well it was supposed to be.
 I really wanted to dedicate this blog post to my sister and my sister-in-law. You see they both have their own blogs too. My sister is kind of using her blog like it's a journal. We get to see inside some of her own inner-journey. My Sis' Mel has two gorgeous kids, works and has recently fallen in love with gardening. I love seeing the pics on her blog and these beauties (recently taken in my own garden) are dedicated to her. It means so much to me that she is doing her blog and I'm inspired by the honesty that she writes with.

My Sis-in-law is also an inspiration. She has a blog too. Her blog is about writing and yes... she is a writer. Her first novel was published about 2 years ago and she has been working ever since. She also works, has 3 gorgeous kids and is married to my brother (I won't comment ;-) I can't imagine how she juggles everything and still manages to keep up with a blog that is inspiring a lot of other people to write as well! My Sis-in-law is gaga about chocolate and this post was supposed to be about chocolate.
And it is.
Sort of.
There is chocolate in it.
To be honest, I just couldn't resist this ice cream. Thoughts of summer (I might be seeing them this summer - they all live in Calgary which is pretty far from T.O.) and the sounds of this recipe just caught me and I couldn't walk away. Who can resist caramel and chocolate. I won't lie to you, this recipe called for a little bit of fiddling. Really though, not only was the fiddling more time consuming than difficult, it was MORE than worth it. You must try this ice cream. I wish that I could send it out to my Sis-in-law and my Sis ('cause I think that she might also LOVE this one) so that we could all enjoy it together.

Chocolate Chip Salted Butter Caramel Ice Cream
adapted from Technicolor Kitchen
2 cups whole milk
1 1/2 cups sugar
4 tbsp salted butter (I didn't have so I used unsalted butter and upped the salt content to 1 tsp)
scant 1/2 tsp sea salt (I used Fleur de Sel)
1 cup heavy cream
5 lg egg yolks
3/4 tsp vanilla
1 cup dark chocolate, chopped
Make an ice bath - fill a lg bowl 1/3 full with ice cubes and add enough water to make them float. In a smaller bowl pour 1 cup of milk and place on top of the ice cubes with a seive at the ready.
In a medium sized sauce pan (heavy bottomed) begin to cook the sugar over medium heat. As it begins to melt stir until it's dissolved. (the lumps will melt) Continue to stir occasionally until the mixture begins to go brown and starts to smell like it's going to burn. Remove from heat and add the butter and salt. Once butter is melted then add in the cream (slowly, stir as much as you can) and the rest of the milk. Return to the heat.

Whisk the yolks in a small bowl and gradually add to the caramel mixture (could just add some of the caramel mixture to the egg yolks first and then add the whole thing back into the pot on the stove) making sure that the yolks will not cook on contact. Stir the whole mixture constantly until it reaches about 170 degrees F (use the spoon trick - if the mixture doesn't come back together once you run your finger through it off the back of a spoon then it's pretty much ready)

Remove from the heat and pour through the seive into the bowl of chilled milk. Mix thoroughly and add the vanilla. Cover the mixture with cling-wrap (right on top of the custard so that a film doesn't form on the top) and continue to chill in the ice bath. Once it's cooled enough put it to refridgerate for about 8 hrs or until completely cooled.
Melt the chocolate in a double boiler and cool slightly.
Pour ice cream into ice cream maker and churn until it starts looking solid. Once it looks ready to put into freezer containers, add the melted chocolate and stir just enough to create a ripple.
Pour into freezer containers and freeze for about 4 hrs.
Thaw just a bit before scooping...

Caramel Apple Cake... an experiement

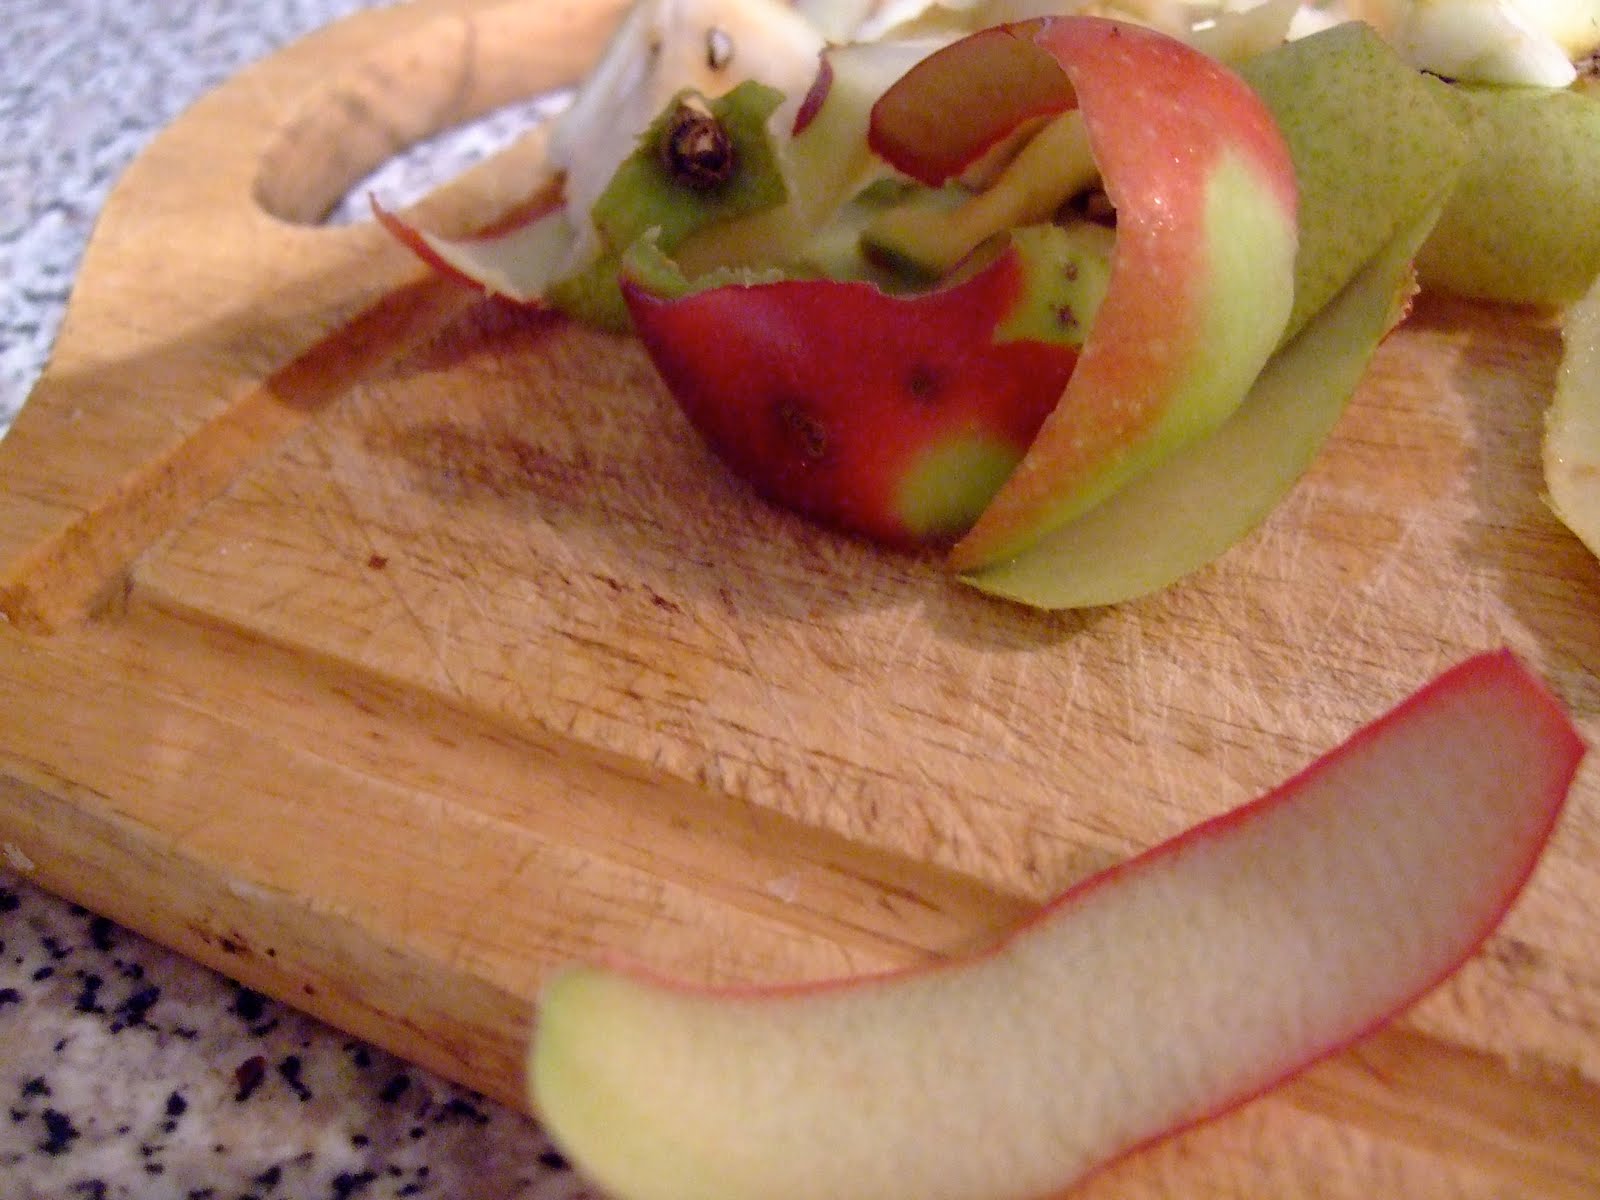
I decided to try this cake from one of our revered Canadian institutions - Canadian Living Magazine. I've read reviews of these kinds of recipes and it seems that they can go either way. Sometimes the caramel gets a little sketchy and it can leave you with a top that is too crunchy and hard. I think keeping an eye on the baking time helps that a little. If you can get it right, it's a very tasty little treat. I'll tell you though, it's certainly no 'thing of beauty' in my opinion.

As usual, I didn't have all the ingredients that the recipe called for. I only had two apples and a pear. The apples were quite small and I think, in the end, more apples (or pears because honestly they were a nice addition!) would have helped the presentation a bit. I also didn't have any lemon in the house and I didn't notice the absence at all.
The title sounded a lot more exciting than the humble little cake looks when you are done with it. Like I said though, it is tasty. I whipped up some cream as well to serve on the side, although some vanilla or caramel ice cream would be just a welcome.


Caramel apple upside-down Cake
(adapted from Canadian Living)
2/3 cup granulated sugar
1 tbsp lemon juice

4 lg apples
1/4 cup unsalted butter
Cake:
1/2 cup unsalted butter
1/3 cup gran. sugar
1/3 cup brown sugar
2 eggs
1 tsp vanilla
1 3/4 cups unbleached all-purpose flour
1 1/2 tsp baking powder
1/2 tsp baking soda
3/4 cup milk
In heavy saucepan stir granulated sugar with 1/4 cup of water over medium heat until dissolved. Bring to a boil and continue to boil vigorously for 6 - 10 minutes or until the mixture becomes dark amber (Just a note here: I boiled mine for more like 12 minutes and when

it started to change colours, it changed very quickly. Be ready to take it off the heat quickly and get it into the pan. Also, it will smell a bit burnt - you are literally burning the sugar after all!). Add the lemon juice (which I didn't have) and Pour into 9 inch round metal cake pan (I would also put some parchment on the very bottom - cut in a circle of the same size - just to make it easier to take it out of the pan).
Pell, core and slice apples into medium thickness slices. In a skills, melt butter over medium heat and cook apples until tender and golden. Arrange the apples in the caramel mixture.
In a large bowl combine the flour, baking powder and baking soda. Set aside.
In another bowl beat butter with granulated sugar and brown sugar until light. Beat in the eggs, one at a time until they are well mixed. Add in the vanilla and mix well.
Add the flour and milk alternately in about 3 batches - beginning and ending with the flour - to the butter mixture. Spread over the apples.

Bake for about 40 minutes (check after about 35 minutes just to be safe). Once finished, invert onto cake plate but wait for about 5 minutes to remove the pan (I used a springform which made this a little easier).
Pecan Cinnamon Cupcakes

This weekend I accomplished something that has been on my list for a long time. No, not my taxes... those are still on my list. This was a lot more fun. I completely reorganized my recipe box. I received a special recipe accordion folder from my Mom one Christmas - probably at least ten years ago. It finally died - the bottom fell out. It was completely and utterly irreparable. So, I've had to move on. I bought a completely ugly but made of recycled material 3 ring binder and put all my recipes in the binder. What was fun about this little project was that I finally had a look at all my recipes. There is a lot of good stuff in there that I haven't taken the time to try as yet. Among some of those recipes I found this little gem. To be honest, I only put it in the folder a few weeks ago. It was recipe that I found in the spring issue of the Food and Drink magazine offered at the LCBO (liquor control board of Ontario - it's a long, sad story). This magazine is really worth checking out online. Some lovely offerings here.

I'm not quite sure what is particularly spring-like enough about pecans to merit this entry in the spring issue but who cares - it looks great and the caption under the title said that it was inspired by fresh cinnamon buns (much better than the stale cinnamon bun, I agree!). The cupcakes come together quickly and they give a lovely spongy texture. The icing can be a little finicky and sets quickly so I found that I had to make sure that I had the cupcakes cooled before make the icing. However, the icing tastes like a cross between caramel and maple syrup - beautiful! Who cares about taxes!!!

Pecan Cinnamon Cupcakes
makes 12 cupcakes

2 lg eggs
1/2 cup unsalted butter, softened
1 cup granulated sugar
1/2 tsp pure vanilla extract
2 cups sifted cake and pastry flour
2 tsp baking powder
1 1/2 tsp cinnamon
1/4 tsp salt
3/4 cup milk, room temperature
1/4 cup toasted pecans, finely chopped

1/4 cup unsalted butter
1/2 cup brown sugar
1/4 cup whipping cream
1/2 tsp vanilla
1 1/4 cups icing sugar
1/2 cup toasted pecans, coarsely chopped

Cupcakes:
Preheat oven to 375 degrees F
 Line 12 muffin tin cups.
Place eggs in small bowl and cover with hot tap water (to get them to room temperature)
Beat butter with sugar until light and fluffy. Beat in eggs 1 at a time and then vanilla. Thoroughly mix sifted flour with baking powder, cinnamon and salt.
Alternately add flour mixture and milk into the butter mixture, beginning and ending with flour. Stir in finely chopped pecans. Divide the batter into the lined cups.
Bake for 18 - 20 minutes or until light golden and a cake tester comes out clean. Cool on a rack.
 Icing:
Melt butter in a small heavy saucepan over medium heat. Add brown sugar and cream. Stirring occasionally, bring to a full rolling boil for 1 minute. Remove from heat and stir in vanilla, cool 15 minutes on a rack without stirring.
Stir in icing sugar until smooth. Immediately ice cooled cupcakes because the frosting sets very quickly. Press a few pieces of pecan into the icing while it's still soft.


... and this is what kid #2 ate!
Subscribe to:
Comments (Atom)
About Me

- Wanda Thorne
- St Michael's Choir School is celebrating it's 75th anniversary year of service to St Michael's Cathedral. Part of the school celebration is a trip to Italy where our boys from Grades 5 - 12 will be performing and celebrating Mass. This blog will be chronicling our adventures. Wanda Thorne is the Vocal Coach at St Michael's Choir School. Gerard Lewis is the Grade 7/8 Homeroom teacher at the Choir School.
About Me
- Wanda Thorne
- St Michael's Choir School is celebrating it's 75th anniversary year of service to St Michael's Cathedral. Part of the school celebration is a trip to Italy where our boys from Grades 5 - 12 will be performing and celebrating Mass. This blog will be chronicling our adventures. Wanda Thorne is the Vocal Coach at St Michael's Choir School. Gerard Lewis is the Grade 7/8 Homeroom teacher at the Choir School.
FBC Member

